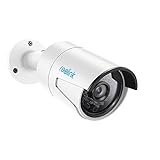
Hey Guys, today we are unboxing, setting up and reviewing the footage of the 4MP PoE mini-bullet security camera RLC-410 by Reolink.


Reolink PoE Camera 4MP Super HD Home Security Outdoor Indoor Video Surveillance Support Night Vision, Motion Detection, Audio, Remote Access, SD Card Slot RLC-410
(as of July 16, 2026 00:51 GMT -06:00 - More infoProduct prices and availability are accurate as of the date/time indicated and are subject to change. Any price and availability information displayed on [relevant Amazon Site(s), as applicable] at the time of purchase will apply to the purchase of this product.)Yes, you heard right, this is a bullet camera. In my past video where I compared the different types of security cameras, I mentioned I no longer owned any bullets, but that is now changing. I like their ruggedness, their glass separation between the camera lens and IR lights to avoid glare, their ability to throw IR light a good distance.
This indoor/outdoor 4MP camera costs about $60US, which is not bad for a brand which is making a good name for itself. This is in part to do with their well-organized product webpages. It’s pleasing to the eye, contains the relevant specs, has a nice layout and great use of icons.
The most common install location for this type of bullet camera in under an eave. The device is so small and lite, it would not require extra support or backing when installing it into the soffit. If you have a junction box for your wiring, you could even mount it onto its cover. If you are not using a junction box to protect the wiring, make sure the hole in the install location is wide enough to fit the RH45 connection. There is a slot cut out of the base in case you cannot drill a hole directly behind the camera. Installing it onto a flat wall works well if you are pointing the camera perpendicular to the wall. The camera will not turn to look along the wall without turning the image.
To view, record and playback footage, since this camera does not have a SD card slot, you would need to use an NVR. The camera is ONVIF compatible, so it will work with and ONVIF NVR. You could also use BlueIris as that application already has Reolink in it list of know working brand names.
Reolink PoE Camera 4MP Super HD Home Security Outdoor Indoor Video Surveillance Support Night Vision, Motion Detection, Audio, Remote Access, SD Card Slot RLC-410
(as of July 16, 2026 00:51 GMT -06:00 - More infoProduct prices and availability are accurate as of the date/time indicated and are subject to change. Any price and availability information displayed on [relevant Amazon Site(s), as applicable] at the time of purchase will apply to the purchase of this product.)Our first test location is looking onto 250ft of empty field. I show about 24 hours of footage. First off, the image has a lot of noise and the IR lights don’t seem to be lighting the subject for increased clarity. Now let’s walk from 250 feet away, right up the camera. I am talking the whole way. During playback I couldn’t hear my voice saying, “this is a mic test” until I was about 30 feet away and I couldn’t make out what I was saying until I was 10 feet away and I had to really crank the volume.
Here is a quick daytime and night comparison in the driveway. One with my house light off and one with them on and one with the IR lights turned off on the Reolink camera.
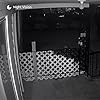
Lastly, here is some inside daytime and nighttime footage.
The Reolink app only offers some very basic features and allow minimal configuration with the camera. The device does have a web user interface you can access using a browser so you can access these advanced features.
- Get the camera’s IP address from the app
- Enter into Internet Explorer
- Login using the credential you used earlier
- On the right side you have lots of image configuration options
- If you click on the gear icon you can see the more advanced features on the left-hand side.
You may have noticed that the on screen display did not change from white to black or visa versa depending on the brightness of the scene. Like the bottom camera, most adjust the OSD color depending on how bright the content is behind it.
I’m not crazy about the nighttime footage quality but the daytime is awesome. It was super easy to setup and at $60, this camera is a great bang for the buck and a perfect entry level device. Reolink does offer a wide range of devices, so do check them out.