Today we are performing a detailed review of Reolink’s Argus 4 Pro+. This camera is getting launched in June 2024 [look at phone, that’s now]. And as of this timeframe, it’s a world’s first “4K Battery Camera with ColorX Night Vision & Dual-Image, 180degree field of view” and it supports Wi-Fi 6.
Right off the bat, special thanks to Reolink for hooking me up with this camera [and a coupon code for you] in exchange for my honest review.
Next, we’ll demo the 3 methods to add storage and discuss how much storage can we add. I’ll show the proper methods and a couple hacky methods. So, Reolink has 3 NVR models that I’ll touch on. An 8 channel, 16 channel and 36 channel. Before proceeding, make sure to manually check if your NVR has the latest firmware. I’ll add links in the description if you need some help on that.


REOLINK Argus 4 Pro, 4K Solar Security Cameras Wireless Outdoor, 8MP for Home Security, ColorX Night Vision, 180° No Blindspots, 5G/2.4GHz WiFi 6, AI Detection, No Monthly Fee, Home Hub Compatible
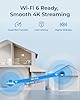
I’m excited to test this device because 4K battery operated cameras are pretty much unheard of. That’s because they require so much extra battery power for features, such as 4K video processing, powering night vision IR lights and streaming high definition over Wi-Fi. A weak Wi-Fi signal will drain the batteries even faster. That’s what makes this camera so exciting, it has no IR lights and it supports Wi-Fi 6 or 802.11ax. It will work just fine on your current Wi-Fi but it will just work better on 6. That doesn’t necessary mean 6ghz, it’s an upgrade of the 2.4ghz and 5ghz frequencies. Not only does Wi-Fi 6 penetrate walls better, it’s faster [in the way of transfer speeds and latency] because it handles more traffic more effectively. It’s also beam forming and will direct its signal towards the router or access point and not in all directions. It also supports a faster Wi-Fi wake time. When selecting a Wi-Fi 6 access point or router, make sure it has an 802.11ax standard. All this enhances battery life.


Ubiquiti Dual Band IEEE 802.11a/b/g 5.30 Gbit/s Wireless Access Point - Indoor/Outdoor
Specs:
The first thing you’ll notice is the face-like appearance of this camera. That’s because this camera, is actually 2 cameras in one. The firmware in the camera, takes each image and stitches them together into one incredible super-wide 180-degree picture. The height of the image is 50-degrees. It feels like these are glasses and the field of view is better than mine. The 2 images together are 4K or 5120X1440 pixels and can record at 15 frames a second. That resolution allows us to read this license plate at a range of 35-feet [10.6m] in these examples. Basically, you get twice the coverage all in one device.
The camera’s eyes look very wide, and this is by design. With an aperture of F 1.0, they allow a huge amount of light onto the 1/1.8-in sensors. So much light in fact that Reolink has done away with black and white night vision and infrared lights. That means, the camera will use any ambient light, like street lights, property lights or even moonlight on a clear night to maximize the details and image quality – all in color.
Ok, let’s jump into some footage of that ideal scenario. Here are we are at night and I have my property lighting on. As I stand here, we can easily read the license plate at 30-35 feet away [just over 9m]. The image is pretty impressive, no noise [or static] and no ghosting. My facial features are also very recognizable.
The camera also has a setting where it will turn on spotlights when motion is detected. The brightness of the lights can also be configured in the app. Here is a comparison of the lights at their brightest and their lowest. In both cases the license plate’s reflective surface will be picked up by the camera, blowing out the plate. My facial features are still recognizable and the colors are pretty good.
Next, we’ll turn off those outside lights and test the image quality in complete darkness. The image is showing some noise or grain, and just a smidge of ghosting; just enough to blur that plate number, but at the 12-15 foot [4m] mark it comes into view. This is some top quality. Some of the best nighttime images I have seen since I started this channel 12 years ago.
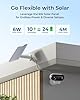
So, without IR night vision lights, the camera obviously provides an outstanding image, especially with some neighborhood lighting. This also allows the camera to save on battery power. I spent hours in the day and night testing this camera, and I didn’t see the battery level go below 85%. Reolink boasts that 10 minutes of solar charging will last a full 24 hours and the 2 internal batteries will last 12 days once fully charged. Battery diagram from pdf and animate it.
The camera is also saving power because it uses a PIR sensor to detect motion. Instead of using extra power to compare incoming frames, the Argus 4, turns off the camera and uses very lower power proximity sensor to watch for motion. It actually scans for energy and temperature changes against the environment, like people, vehicles or animals. Once detected, it wakes up the camera to analyze the trigger as a person, animal or vehicle and at the same time starts recording, then wakes up the Wi-Fi followed by sending a notification. A PIR’s sensor range is about 15-30 feet [4.5 – 9m] depending on the temperature difference, speed of the subject and the size. Here, the PIR sensor is triggered about 25-30 feet away and the camera records the clip. The PIR motion setting must be turned on in the all. Also, to get notifications, this feature must be on as well. I was getting a lot of false alarms from the trees moving in the wind, so I turned off the ‘others’ setting, so I only get notified if a person, vehicle or animal is detected. Oh yeah, since this is a battery-operated device, it only records to the micro-SD card when motion is detected and it doesn’t support continuous recording. So, this camera will not connect to the Reolink NVR or a third party security camera management tool, like Blue Iris. It does however work with the Reolink PC app but gives you a friendly notice about battery life.
Back here on the camera’s face, we have an environment lighting sensor, so the camera only turns on its spotlights at night. As you saw, there are 3 spotlights. They can be configured to turn on when the PIR sensor picks up motion. They can also be illuminated manually using the torch icon. [do this in studio]
Right below the middle light, we have a microphone. In that example, it is pretty windy out and the mic filtered a lot of that wind noise out. Pretty cool.
If we spin the camera around, there is a speaker on the back. Here is a sample of the 2-way audio. Yes, I did notice a little lag, but not a deal breaker. [“not a deal breaker” in the studio]. The camera also features an alarm. I think it’s a little quieter than expected, especially at this distance. The alarm can be triggered on motion alerts, or you can record your own. [Do this in studio.]
On the back we also have this little USB charging port and this is also where the solar panel gets connected making a water tight seal.
Under the rubber cover on the bottom, we have a power button, and a micro-SD card slot, for cards up to 128gigs. [hold phone] Simply drop in the card and format it before use. The motion recording can be accessed remotely from the micro-SD card removing any requirement for subscription or cloud fees. And check this out, when looking at the past footage, go to Playback, select the type of playback you want to see and as we review the thumbnails, the camera is showing us multiple frames simultaneously. [turn phone sideways] That’s a cool feature and an indication of the increased processing power of this camera.
Like I mentioned before. this camera will connect to any standard 2.4 or 5Ghz Wi-Fi network. I am using Wi-Fi 6 on these frequencies. If you are familiar with my channel, I use Ubiquiti Wi-Fi access points inside and outside give me excellent connectivity. Once you have an Ubiquiti mesh network, adding additional devices is simply plug and play. Here is the new access point in my Ubiquiti manager. I click to add it and that’s it. Once added, I can specify the Argus 4 to only use that access point to take advantage of this new Wi-Fi 6 feature. For more information on these access point and my setup, check out my other videos.
Let’s check out a quick time-lapse of how I installed this camera. Here is a studio demo, followed by outside.
Perfect, it only takes a few minutes and we’re in business. And I really like the look of this camera.
Next, we’re going to check the range of the WiFi. For the first test, with my phone on the cell network, I took the camera 300ft or just over 91m away from my house. At the half-way mark, I had no issues and thing were stable for this huge distance, until I hit these trees. I then switched from 4K streaming to the 1k sub-stream where I could stream without lag. Pretty impressive.
Let’s try this test again, but let’s go for a walk down the street. Long story short, I was almost 600 feet [182m] away from the access point with the Argus 4 before I lost connectivity. Not too bad at all. Oh yeah, the security camera continued to record without a network connection. That’s a cool feature too.
Lastly, we’re going to break out the water hose and see how this camera stands up to a torrent of rain.
Pretty cool, the camera had no issues dealing with all that water.
Alright guys, time for some final thoughts. I did find there was some lag with the live feed in its highest resolution. I’m more accustomed to wired devices with no lag. It’s not a deal breaker but the is the nature of wireless devices. Secondly, I wish the record time of any motion recordings was longer. I’d like an additional 10-15 seconds of footage after motion was last triggered. Same goes for the LED lights. I wish they stayed on a little longer when triggered.
For the stuff I liked, let’s look at a few. Wi-Fi 6 has met my expectations in wake-up time, speed and range. Battery life is also great. I spent hours, day and night testing this camera and the battery stayed strong the whole time. The overall stability and processing power was also noted. I had very few issues with interacting with the camera over the iPhone app or PC app. I was able to change settings, export footage all while the camera was reacting to motion and recording new clips. Lastly, the footage is amazing and it deals with shadows and colors very well, but the colorx has to be one of my new favorite features. This is my first all-color camera with no black and white nighttime option. In an environment with some ambient community light, it works great with next to no blurring or ghosting.
Links to everything seen here today are in the description. I’ll also post an Amazon coupon code for the US, CA, GB, AU. The code is good for June of 2024. As always, if you found this information helpful, do let me know with a thumbs up and please show your support by subscribing so you don’t miss any future HomeTechDIY projects that you can do yourself. Thanks for watching.
REOLINK Argus 4 Pro, 4K Solar Security Cameras Wireless Outdoor, 8MP for Home Security, ColorX Night Vision, 180° No Blindspots, 5G/2.4GHz WiFi 6, AI Detection, No Monthly Fee, Home Hub Compatible
😁😁😁Check the Latest Deals at Reolink.com😁😁😁
👍 As seen in video: Reolink 8 Channel NVR (N7MB01): https://reolink.com/us/product/rln8-410/?aff=216
👍 Reolink 16-Channel NVR: https://reolink.com/us/product/rln16-410/?aff=216
👍 Reolink 36-Channel NVR: https://reolink.com/product/rln36/?aff=216
👍 Upgrade the NVR to 16 Channels and add an extra Hard drive: https://reolink.com/us/product/rln16-410/?aff=216
👍 Reolink Duo 3: https://reolink.com/us/product/reolink-duo-3-poe/?aff=216
⚡⚡⚡⚡Amazon Products:⚡⚡⚡⚡
Fantom eSATA External Hard Drive: https://amzn.to/3JGU7UC
Western Digital WD Purple Surveillance Internal Hard Drive HDD: https://amzn.to/4be2Ppc
SATA 22Pin to eSATA Data USB Powered Cable Adapter: https://amzn.to/3UH5cvg
SATA Cable Y-Splitter: https://amzn.to/3QoYKXq
Manually update your NVR’s firmware (my video): https://youtu.be/jZVJlM8cEM4
Manually update your NVR’s firmware (Reolink’s Support Center): https://support.reolink.com/hc/en-us/articles/900003659286-How-to-Upgrade-Firmware-via-Reolink-NVR-New-UI-/
Maximum size eSata Drive for each NVR: https://support.reolink.com/hc/en-us/articles/900004550003-How-Many-HDDs-Can-I-Connect-with-Reolink-NVR-System/
Maximum size of Internal Drive for each NVR: https://support.reolink.com/hc/en-us/articles/900000602543-Hardware-Version-of-Reolink-NVRs/
💻💻💻💻 Blue Iris 💻💻💻💻
😀😀😀 Download, Demo and Buy Blue Iris: http://www.hometechdiy.com/buy-blue-iris/